SUBMIT WEDDING
View Posts By:

categories


tags

 
When High School Sweethearts Wed in a Romantic Summer Ceremony at Arrowhead Hill

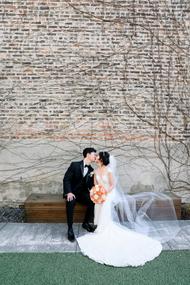
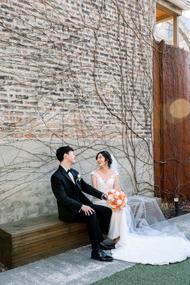
Muted sunset hues, a gown fit for a princess, and a dreamy gray barn setting – today’s wedding planned by Sweet Tea and Linen is a Pinterest board brought to life. The Farmer and I created heavenly arrangements of brightly colored blooms that made for the perfect color pop against the white interior walls of the venue. To see every last detail of their day captured by Courtney Leigh Photography, don’t forget to head on over to the full gallery of inspiration.

From Courtney Leigh PhotoAnna and Matt rescheduled their wedding from late spring to mid-summer due to Covid and they were finally able to have the wedding of their dreams. They booked a beautiful new venue in Montgomery, TX with a refined, modern and elegant barn design and based their colors and florals on a Texas sunset. Anna had the most meaningful details, from using her parents wedding cake topper to a ring bearer pillow made out of lace from her mom’s wedding dress, to the acrylic etched vows… This wedding was nothing short of a dream.

From the Bride… Matt and I are high school sweethearts turned college sweethearts. I was on our high school’s drill team and Matt was a Trumpet player in the band. In the stands every Friday night, the drill team and band were always right next to each other. It was known among my friends that I definitely had a crush on Matt, and I found out later that Matt also felt the same about me. We ended up hanging out with each other all night at our Senior Homecoming instead of with our dates and I even drove him home in the morning. He finally asked for my number (on Facebook) a few weeks later and then shortly after we began dating and have been together ever since!

What did you envision your wedding being prior to planning?

The biggest thing I wanted and envisioned was an outdoor fall wedding. My now husband was completely opposed to a fall wedding simply because it would interfere with football season (Geaux Tigers!) while my parents told me I could get married outside, but my dad would drop me off at the alter then proceed to head indoors to sit in the AC with my mom watching from afar (if you know Texas and outdoor weddings, then you’ll understand the humor behind this!) Long story short, Matt said I do while not simultaneously asking for score updates and both of my parents were physically in attendance. : )


What was your color palette and your style vision?

My indecisiveness hit hard with determining the color palette, and after months of contemplation, a decision finally came to me. I ended up searching color palettes on pinterest and stumbled across one based off of a sunset and was instantly hooked. Muted sunset colors for my florals with my main color for bridesmaids dresses being a pretty blush pink.

What unique elements or details did you include?

I ended up finding someone who was able to etch our vows on to acrylic sheets. They turned out beautifully in photo and video for our wedding but also doubled as a beautiful keepsake. The cake topper that I placed beside my cake was actually my parents cake topper from their wedding. They have always had it displayed in our childhood home, along with a few other wedding keepsakes, and they decided to pass it on to us. My ring bearer pillow was made by my grandma from my mother’s wedding dress. One of our best decisions was asking our friend to officiate our wedding. He was one of Matt’s fraternity brothers and has been such a close friend of both of ours for years. It felt so personal having someone that is a part of both of our lives that we love dearly to marry us. He absolutely nailed it and Matt and I both agree it was one of our favorite small touches to our wedding day.


What was your favorite moment? Your favorite crafted detail?

I feel like this is the hardest questions to have to come up with an answer for because it was my favorite day filled with so many amazing moments. From my matron of honor gifting me with a book of letters written by all my loved ones, to my first look with my dad where he asked me to carry my late grandad’s pocket knife, to my first look with Matt, to being prayed over by my sweet bridesmaids, to MARRYING my best friend then getting to celebrate the night away with our loved ones, it was our dream day. It’s not a single moment but looking back and being able to be married and celebrate with our loved ones will forever be one of my favorite memories. During this time of so much uncertainty, so many changed plans, and so many loved ones who were not able to attend, love still wins because I was able to say I married the love of my life.

From the Groom… Hands down, my favorite moment of the day would be hearing Anna’s vows for the first time. She is the one person on Earth that truly understands who I am at my core, and she loves me unconditionally. We are both so passionate for each other, and hearing that our loud on such a special day is something I will never forget.

Tell us about your flowers, your gown, your favors, your cake, etc.

Flowers = flawless. Carrington, owner and creative behind the Farmer and I, absolutely brought my dream to life. The only detail that stuck from beginning to end during my wedding planning process was that I wanted colorful flowers and Carrington 100% delivered. I stumbled across her on Instagram one day and instantly fell in love with her style and knew that I could trust her to bring my vision to life! Gown: I felt like a princess in my gown! I never thought I would be one to want or wear a ball gown, but I would not have wanted any other dress! I loved every detail from the sparkle to the lace! Cake: I surprised Matt with his groom’s cake, which ended up being a Whataburger cake with a little bit of LSU thrown in there as well! He loved it and it was just another way to say “hey we’re from Texas” and “Geaux Tigers!”


What is one piece of advice that you could give bride’s to be?

Remember that at the end of the day you will still be able to say you married the love of your life! My Matron of Honor and I, who were both going through having to plan a wedding in the midst of a pandemic, constantly reminded each other of this. Through all of the stress, upsetting news, and constant changes, it felt like having a wedding during this time wouldn’t be worth it with so many of our loved ones missing. I will say this to any and everyone, it was SO worth it. It was still our day, we were still surrounded by so many loved ones, and we because husband and wife! This is what getting married is about and all the rest is just the icing on the cake!

Photography: Courtney Leigh Photography | Event Planning: Sweet Tea and Linen | Floral Design: The Farmer and I | Dress: Brickhouse Bridal | Wedding Dress: Brickhouse Bridal | Cake: Three Brothers Bakery | Invitations: Jo's Paper Kitchen | Shoes: Badgley Mischka | Bridesmaids' Dresses: David's Bridal | Catering: All Star Catering | Men's Attire: The Black Tux | Vintage Car: Royal Coach Classic Limo | Wedding Venue: Arrowhead Hill | Acrylic Etched Vows: Etch Xpress | Film Lab: Goodman Film Lab | HMU: Hey Lovely Makeup

These Vendors are members of our Little Black Book.
For membership information, click here
The Ultimate Christmas 101 Decorating Guide

If you’re starting from ground zero, decorating for the holidays is an almost daunting task. Do you need garland? How many wreaths are too many? How many is just enough? What all actually goes on a Christmas tree? Do you need nutcrackers? While the answer is completely subjective and up to your tastes, like anything home decor related there are best practices to help guide you in your preference discoveries.

So without further ado, your ultimate Christmas 101 Decorating Guide!

At the core, there are 4 locations that scream for a little holiday attention more than any other place in the home. These can be improvised, ultra-creative and sometimes downright unconventional, but starting by looking at these core locations sets the tone for the rest of your home

THE CHRISTMAS TREE

The star of all holiday decor, the Christmas Tree is where most memories are made and therefore deserves to be the baseline of your attention and planning. You can go real or faux, eclectic or completely coordinated — but whatever you decide, here are the elements to consider

The Tree Itself: take your space and budget into account first, then look at aesthetic. You can get a tree that looks like it’s been dusted with snow (“flocked” being the primary term there!) You can get gorgeous accorns attached, you can get even get skinny trees!

Lights: Typically the biggest decision here is to go for multi-colored or white lights, but also take into account if you want to go on a limb and go for the ultra retro-glam large-bulb strands. Those bad boys can take your tree to the next level.

Beaded Garland: Another layer of tree decor to layer through the branches is a good strand of beaded garland. These weave in and out of trendiness, but they are a true classic. Whether you go for metallic, wooden or felt stands, they do wonders for elevating you tree game.

Bows and Ribbon: Arguably our favorite part of all tree decor, this combination is elegant to the MAX. Whether you opt for ribbon that cascades down from the top of your tree or loops in and out of branches along with your beads, you cant go wrong with adding this little elegant detail.

Ball Ornaments: These ornaments are the baseline of all your other ornament decor. Opt for a coordinating color scheme that works well with your other tree elements and you’r tree will feel perfectly filled out in no time. Sentimental Ornaments: These are typically collected over time and include a variety of knick-knacks, hand-made elements or collectables you simply just *liked.* Don’t over think this part! If you like it, it’s the right decision to get it and display it proudly.

Tree Skirt or Collar: Often overlooked but sadly noticed when it’s gone, the tree skirt is the baseline that grounds the entire tree. Without it, your tree looks naked and that’s just sad. We love a good knited tree skirt with pom-pom detailing or even going out on a limb to opt for a tree collar!

The Topper: Much like a tree skirt, the topper is a high-impact element of the whole ensemble. Choose your topper with care! You have many, many options. Some go for an angel, some go for a traditional start, others make a neatly tied bow the center of attention and we’ve even seen a bird or two perched at the top regally tying everything together.

THE MANTLE

The mantel can be both literal and created, but the main purpose of the mantel is to house the stockings. So don’t fret if you don’t have a mantel — create one! You can use a blank wall, a piano, an entry table, a console piece or even your tv table.

Garland: if you’re working with a mantel, this fills it out beautifully and denotes it as a holiday focal point. If you’re not working with a traditional mantel, a bit of garland signals that you’re using that piece of furniture as your mantel!

Lights and Beads: We can’t recommend little bits and bobbles enough! These simple elements dress up your garland in a really functional and fun way! Don’t overlook this detail. Stockings: The hallmark of a festive mantel — your stockings play a super important dual role of looking good and holding your goodies :)

Stocking Holders: Frequently forgotten and always missed when they’re not there, the stocking holders need to be sturdy but bonus points for making them look good too.

Focal Point: if you’re working with a traditional mantel or a piece of furniture, you’ll need an overhead focal point. Whether that’s a wreath, a mirror or even your tv, the extra effort to make it festive goes a long way.

Bits and Bobbles: There’s really no elegant way to word the idea of “things you place on the mantel that are cute but don’t really have a category.” This can be candle-sticks, nutcrackers, animal figurines or tiny Santa-Clauses. Whatever you choose to display here gets some significant eye-time, so make sure it pops!

THE TABLE

The holidays follow all of the same rules of thumb when setting and decorating, but the thing that makes the holiday table extra special are the things that layer in on top of the norm a juj it up.

Plates and Chargers: You can go ALL out here and festiveness or you can layer in basic pieces with festive pieces for a nice balanced look. We like to go for a festive plate and multi-purpose crisp charger.

Name Cards: Whether you actually put names out on your table or not, a little token nod to the season is a cute way to add some festive holiday themed decor without going majorly overboard.

Tiny Wreaths: Our favorite decorative piece in our whole arsenal, the tiny wreath can do SO MUCH for you table. From gracefully lying on top of a plate to being beautifully tied to the back of a chair, this multi-use token is a great way to make your table cheery.

Linens: Another great place to bring in a festive baseline is with your linens! Napkins, table runners and tablecloths all create a graceful, festive scene.

Napkin Rings: Don’t know how to fold a pretty napkin? No problem! Napkin rings are your solution. They’re a fool-proof way to make your linens look good, and when you get them specific for the season they really do wonders for making your table look like that of a pro.

Center Piece: This can be a strand of garland, a cluster of candlesticks, a bowl of ornaments or even a vase of piney stems. The sky is the limit when it comes to your holiday tablescape!

THE FRONT DOOR

The entry of any living space automatically sets the tone for what you’re about to find inside. The front door does the same for your Christmas decor! Any type of front door in any sort of living space could do for a little festivity.

The Wreath: Arguably your most important wreath of all the wreaths, this one is your “welcome!” “hello!” “come in!” and because of that it deserves some special attention. Whether your opt for a full, leafy real-life pine or a modern hooped loop, your door will look better and more festive no matter what.

The Door Mat: This is one of our favorite elements of the front door because it’s an opportunity to let your personality shine. Are you more of a classical kind of person who likes the traditional wordings in a great font? Are you a witty online shopper who likes to purchase a doormat with package hiding instructions? Or are you a whimsical festive fanatic who likes to see their favorite Christmas lyric as they enter their home? Whatever the case, own it! You do you here and make the most of it.

Garland: Can you tell we love garland? There are few places we can think of where garland *wouldn’t* work, but one of the most impactful places you can use a big hulking bunch of garland is framing your front door. It looks fab no matter how you install it — perfectly symmetrical or intentional off balance — so have fun and make it look good to you.

Potted Greenery: We’ve seen everything from poinsettia, tiny evergreen trees to topiaries tied with red bows. If you’re the kind that likes to swap out your potted plans seasonally, this is your time to shine and think outside of the festive box!

Figurines: You don’t have to go entirely Clark Griswald here to be festive. You can opt for small lanterns, tastefully-lit deer or even a sweet sleigh filled with poinsettia. A small token of festivity makes your entry that much more cheery.

THE DETAILS

While these aren’t core locations, it is often the smaller details that complete the transformation.

Candles: The scent of your home can be a true dictator of holiday festiveness. Whether you’re a warm vanilla type, a slim pine type or a crips cranberry kind of candle person, nothing makes a bigger impact that thinking through the sense of smell.

Pillows and Throws: A great way to add maximum impact with minimum effort is to swap out your day-to-day pillows and throws with festive alternatives! Think cozy knits, cheery colors and whimsical sayings.

Music: Another sense to add to consideration is what plays in the background. We can’t recommend a mellow, instrumental big-band jazz playlist enough for your “scene-setting” mood. Just throw it on and you’ll instantly feel like you should be in smack dab in the middle of the White Christmas movie.

So there you have it! A simple yet inclusive list to get you started on your holiday decor. And don’t forget, at the end of the day it’s a collection of years of effort. so don’t stress the little things :) You’ve got this!


Photo: Carla Taylor

A Beginner’s Guide to Designing Your Wedding Tablescapes (It’s Easier Than You Think!)

Once you’ve got those rings around your fingers and you’re getting a feel for your new titles (yup, we know you’ve been fantasizing about that iconic, much-anticipated introduction by your fabulous emcee: buh-bye fiancé/fiancée, hello hubs or wifey!), it’s time to settle in for the night–and pulling up a chair at a wow-worthy table is exactly what we’re talking about. Whether you’re planning on doing a traditional plated dinner, with predetermined table arrangements or an en vogue, extended cocktail hour approach with freestyle seating, you’ll want to be sure your tablescapes are on-point and inviting. And we’re not just imagining beautiful blooms (although petal power is a major part of it!). 

PHOTOGRAPHY | Linda Nari Photography


Setting a Table–A Beginner’s Guide to Wedding Tablescaping Genious

1. Start with a neutral or muted canvas.

Don’t get us wrong, we love a bold, punchy palette, but when you’re starting to think about tablescaping for your reception, you’ll want to start with a simple backdrop–like white, ivory, blush, grey, powder blue, etc. linens–and then layer on texture and intrigue. Smart to consider, too, if your venue doesn’t stock a kaleidoscopic range of colored tablecloths.

PHOTOGRAPHY | Linda Nari Photography


2. Freshen up with flowers.

To quote Monet, “We must have flowers, always, and always.” Your florist will help you figure out what kinds of floral centerpieces work best for your tables (round, rectangular, etc.), but you’ll of course want to bring in statement colors from your aisle aesthetic and also incorporate some grounding tones to go along with the neutrals in the rest of your tablescape. Balance. Balance. Balance. 

PHOTOGRAPHY | The Byes Photo


3. Clean your plates.

With color, that is. On a blush canvas like this, a nice bright white combination of plateware (a monochromatic matching of dinner plate AND charger) works beautifully. It’s clean and modern and allows anything placed on top to pop. A single stem placed underneath a wooden or acrylic place card is stunning in its simplicity and consider a little something special at your seats!

PHOTOGRAPHY | Studio Opia


4. Mix in some metallics.

A gold (or any kind of trendy metallic–copper, rose gold, platinum, silver) moment will never be missed, but doesn’t need to be overdone, either. We like to see gilded touches play out in the flatware, rimming on wine or cocktail glasses and coupes, candlesticks, calligraphy-laced place cards, and table number stands. Or, you can go with gold foil for a streamlined hint of elegance. 

PHOTOGRAPHY | Faith Roper Photography


5. And light it up.

Because we’re pretty sure there’s nothing more romantic than candlelight, during the day and definitely at night. You can do it with tall, statuesque tapers – blush and gold always play nice together–and then temper things with entrancing tealights. 

PHOTOGRAPHY | Jaye Avery Photography

Now back to that ‘sitting at the head table’ situation. We certainly love –a couple cozying up to their tribe for toasts and table talk–but a sweetheart table, reserved with custom signage also does it for us! The photos taken right before the newlyweds see their reception space and sit down to their first meal as a married couple. We’re not crying…you are!!! 😭  So, turn up your tablescaping skills and who knows, maybe it’s your wedding we’re featuring on Style Me Pretty next!

PHOTOGRAPHY | Jenny Quicksall

Danielle Halibey is a writer, editor, and publicist living in New Jersey. She has been immersed in the world of weddings since planning her own whimsical, romantic affair in 2014. And isn’t that what they always say, “those who can’t do, teach?” Well, once her nuptials were over, she still had stuff in the ‘I Do’ industry to do. She writes regularly for top wedding blogs including Style Me Pretty and Wedding Chicks, and has garnered millions of press impressions for brands in the wedding space: fashion, beauty, wedding talent+tastemakers and more. 

These Vendors are members of our Little Black Book.
For membership information, click here
This Micro Wedding Brings Provence Lavender Inspiration to the Pacific Northwest

Dreaming of a romantic destination wedding in the French countryside – but COVID travel restrictions bursting your bubble? Don’t fret, we may have just found the stateside venue of your Provençal dreams. Today’s stunning styled shoot at Woodinville Lavender planned by Rose Andrew Events is the epitome of natural beauty. The bride absolutely took our breath away in her long sleeve Reem Acra gown complete with a French lace turtleneck and feminine skirt. Botanique Flowers created elegant arrangements that perfectly complimented the lush, lavender field setting. To see all the destination inspiration this shoot has to offer, head on over to the full gallery – all taken by Whiskers and Willow Photography!

From Whiskers and Willow PhotographyThere is nothing like the majestic view of miles and miles of lavender fields in Provence. While COVID-19 has caused postponements and cancellations of weddings abroad, our creative team brought the romance and European flair of Southeastern France to the beautiful Pacific Northwest! From Emily Muddiman of Rose Andrew Events: “My muse for this design was a bride who was forced to postpone her European nuptials but wanted to celebrate her marriage in a way that felt regal yet approachable, romantic, intimate and true to the region where she originally planned to wed. We loved the setting of Seattle’s venue, Woodinville Lavender. It features acres of blooming lavender and the most charming white greenhouse. With our location and inspiration in mind, we chose a neutral color palette with pops of color! 

Our ceremony was set in the lavender fields and guests sat on French inspired soft seating. Large lush arrangements of homegrown blooms were created by Kelly of Botanique and adorned the alter and tables. The tables featured rich textured linens paired with plush velvet napkins, handmade ceramic plates, pearl flatware and cut crystal glassware. We incorporated tufted linen benches to elevate the look and feel of the setting. I worked with our talented stationer, Crystal of the Fancy Cat Studio to dream up an invitation suite and corresponding day of paper goods that felt timeless and reminiscent of European regalia. 

Her custom crest on the invitation, the corgi and unique guest name lasered on velvet napkins, and the chartreuse menu pockets gave the day an extra dose of unique French opulence. The cake, perfectly created by Missy of Missy Lee Cakes, featured tall opulent tiers and fondant appliqués that mimicked the curves and aesthetic of the custom crest created for our couple. For the wedding look, our bride wore a stunning Reem Acra gown— made complete with a French lace turtleneck, elegant sleeves and an over the top skirt. Paired with her white crystal studded Jimmy Choo’s and diamond earrings, her bridal ensemble was feminine yet grand. She carried a colorful bouquet of hydrangea, garden roses, lavender and wildflowers. Our talented Hair and Make-up artist styled her natural curls in a french updo and adorned her bun in a gorgeous hair wreath by Riot of Flowers. Standing beside her, our groom wore a classic black tux and the sweetest boutonniere to compliment her elegant bridal look. Jackie, of Whiskers and Willow, beautifully captured this wedding inspiration!

Photography: Jacqueline Benét Photography | Floral Design: Botanique | Cake: Missy Lee Cakes | Stationery: The Fancy Cat Studio | Men's Attire: Men's Wearhouse | Venue: Woodinville Lavender | Accessories: Riot of Flowers | Bridal Boutique: Nyanza Bridal | Design and Planning: Rose Andrew Events | Furniture Rentals: Fanciful Rentals | Gown Designer: Reem Acra | Makeup and Hair Stylist: Jen Lagers | Models: Seattle Models Guild | Tabletop Rentals: Pedersen's Rentals

Some of Our Favorite Celebrity Engagement Rings and How You Can Achieve The Look With Taylor & Hart Custom Rings!

When it comes to engagement rings, well, you could spend all day happily staring at photos of different designs and styles and still not know which is the best choice for you or your partner! Maybe that’s because an engagement ring is about not only a good design, but a sentimental meaning. To help bring that beauty and personalization together, Taylor & Hart creates heartfelt custom wedding and engagement rings that capture your story. With ethically-sourced diamonds and gemstones, you not only get the comfort of knowing you’ve made a sustainable purchase, but you can have a ring that you helped design alongside your own personal design consultant! They also have their own collection, which I think you’re going to want to check out below….where they outline how a handful of their pieces have taken inspiration from our A-list friends!

These days, couples are no longer constrained by the limited options displayed on the local jewelers’ shelves. With boundless imaginations, today’s couples want to find a unique ring design to match. Anything less than a custom engagement ring or wedding band feels impersonal. But thanks to innovative technologies such as 3D CAD designs and printing, it’s now possible for anyone to create a one-of-a-kind piece of jewelry that reflects their style and personality, while celebrating their self-expression & creative freedom.

Creative freedom also means getting inspired by your favorite celebrity & being able to have a ring similar to theirs. Taylor & Hart breaks down some of the most iconic celebrity engagement rings to spark your own inspiration when it comes to what design is right for you!

Hailey Baldwin Bieber

The Demure design is the most petite solitaire in the Taylor & Hart collection. Set in 18ct yellow gold, the band is 1.6mm wide with a rounded profile and sculptural eagle claws proudly holding its centre diamond in place.


Meghan Markle

This ring made waves around the world when Meghan Markle and Prince Harry got engaged in 2018. The ring appears to be a trilogy style featuring an elongated cushion cut centre diamond flanked with round diamonds. Keeping on trend, Harry opted for a mixed metal ring, with white gold claws accentuating the bright nature of the diamonds. Harry revealed that the band is 18ct yellow gold, to honor Meghan’s favorite metal. Markle’s design closely resembles the Destiny engagement ring design. Mixing tradition with sentiment, a trilogy engagement ring is representative of the past, present and future.  However Taylor & Hart always encourages you to add your personal touch, customize the design & make it yours. 


Blake Lively

Blake Lively’s 12 karat oval diamond rose gold engagement ring is undeniably one of the most impressive celebrity engagement rings of the past decade. With its oval diamond set in a romantic rose gold three row pavé setting, this ring is both delicate and show-stopping and Lively is certainly not afraid to show it off. 

Taylor & Hart took inspiration from this iconic design, and added the Halycon to their engagement ring collection. With 122 diamonds in the band, the triple row of pavé diamonds adds an architectural element to the design, packing a powerful punch.

Beyonce

Jay-Z quite literally “put a ring on it”, and what a ring it is. Beyonce’s engagement ring features a show-stopping 18 karat emerald cut diamond with a split-shank diamond pavé band.  Set with classic pavé diamonds, a split shank gives rings a more ornate finish with a greater presence on the hand. Many celebrities opt for a glamorous emerald cut diamond engagement ring, harkening back to the elegance and excitement of old Hollywood. 

The Symphony from the engagement ring collection is a perfect alternative to Beyonce’s design, with two diamond encrusted bands that split and attach to the centre diamond, which is held within sculptural eagle claws. This design is set with a princess diamond, but can easily be customized to fit other diamond shapes. Viewed from above, the diamond centre seems to seamlessly float above the finger.

Jennifer Lopez

The ring embodies J.Lo’s personality–bold, confident and powerful. Its presence is emphasized by the classic simplicity of the design itself. Known for their subtle elegance, emerald-cuts are the preferred shape among celebrities for large engagement rings. Wearers are drawn to the sleek architectural beauty of the shape, known for its seamless fusion of light and dark planes called the “hall of mirrors”. 

If Lopez’s mighty 20 karat emerald diamond is slightly out of budget, the engagement ring design bears resemblance to the Hope from Taylor & Hart’s collection of classic solitaire rings.

Mary Kate Olsen

Olsen’s engagement ring certainly reflects her love of vintage design and is both elegant and timeless, with attention drawn to its four karat European cut diamond as the centerpiece and main focal point. A European cut diamond is a predecessor of the round brilliant, created in the late 19th century, cut using antique techniques. The centre diamond is surrounded by 16 custom cut vivid blue calibre-cut sapphires. 

The ring is larger than life, and many may prefer a ring which is a little more subtle and suitable for everyday wear. The design can be reworked in a variety of ways to suit those with less extravagant taste, while retaining the opulence and elegant symmetry of the original design.

Kate Middleton

Whether you’ve considered a sapphire engagement ring previously or not, most would admit that Kate Middleton’s design sets the standard for iconic engagement rings. It reflects Middleton’s definitive beauty and classic tailored looks—emulating a classic, bold, yet refined style. The ring was once worn by Prince William’s mother, Princess Diana, and after his engagement to Middleton, its fame grew exponentially. The iconic sapphire engagement ring has garnered fans across the globe with its cluster halo of 14 diamonds surrounding a 12 karat deep blue oval-cut Ceylon sapphire set in a white metal—most likely white gold.

This classic style can be replicated in a number of ways to suit any given price point & design preferences. Middleton’s engagement ring design bears resemblance to the Allure from the collection of halo rings. 

Katy Perry

Perry’s engagement ring is an oval purplish-red ruby surrounded by round diamonds, framed with a delicate milgrain halo. Milgrain is a raised metal beading effect, often seen in antique jewelry, usually featured along the edges of a design, serving as a textured frame to highlight the stone at its centre.

Never one to shy away from experimental fashion, the deep ruby tones and shimmering diamonds in the halo are reflective of Perry’s bold sense of style. While the vintage style pays homage to tradition, the combination of the rich ruby and the dramatic halo diamonds brings this design a sense of individuality.

Lily Collins

The Emily in Paris star Lily Collins recently became engaged on a romantic, sunny trip to New Mexico. The unusual engagement ring features a bezel set rose-cut diamond ring, set in 18 karat gold with a chunky brushed band. The understated, bohemian style of this engagement ring perfectly suits Lily’s laid back style. Rose cut diamonds date back to the 16th century, and are typically found in vintage jewelry styles and hand carved by jewelers, making the gemstone quite rare and sentimental. 

Collin’s design closely resembles the Purity engagement ring design. If you liked the bezel set feature of Lily’s engagement ring, but want to go in for a slightly more refined band, the purity ring features a cushion diamond set in a delicate bezel of yellow gold.

“Even though proposals center around that one iconic question, they’re also an opportunity to express your love through more than just words. We’re often at our most creative when we find ways to let someone know how much they mean to us. Which is why we think every element of your engagement ring should have a meaning personal to you and your partner. After all, this might be your best chance to make the ultimate expression of love.”

In 2020, Taylor & Hart endeavored to make this ring buying process as magical as the engagement itself, which led them to open their new showroom in NYC’s iconic Freedom Tower. And until the end of this year, with every ring order over $1,500, Taylor & Hart will be gifting you this diamond pendant to celebrate your love in all its forms. Just a little something, from them, to capture your story and hold it close to your heart.

Rings: Taylor & Hart

How to Style an Intimate Wedding That Will Still Wow Your Guests!

We’ve said it before and we’ll say it again, folks… an intimate, micro wedding can be just as breathtaking as grand, lavish affairs! Don’t believe us? Then allow today’s gorgeous shoot from Cavin Elizabeth Photography to prove us right. Cavin kindly walks you through each element of a micro wedding, highlighting the many design opportunities that can be accomplished with a smaller guest count. Ready to see all the inspiration? Along with Studio Fleurish’s jaw-dropping arrangements? Then head on over to the full gallery of details!

From Cavin Elizabeth PhotographyDue to the pandemic, many brides are moving toward micro weddings and abandoning the idea of hosting a 150/200+ person affair. With the world of weddings in an unknown state, I think planning smaller guest count weddings will be much safer in terms of health but also in the higher chance of the wedding being legally allowed to take place. For this editorial, we wanted to showcase the beauty of fall and how you can style an intimate wedding that will still wow your guests. Smaller tables of single households might become a trend for future weddings and with small guest counts, it’s much easier to fully deck out each table without breaking your budget. Nadine of Studio Fleurish designed two separate tablescapes. 

The first consisted of fall-toned pastels and the second a more moody palette. Brides could opt to design their wedding tablescapes with just one of these palettes or mix up the design and spread both looks across all of their tables. Next, a lounge is perfect for intimate weddings. After dinner, guests can mosey to the comfy sofas to enjoy cocktails and conversation. You can’t go wrong with a neutral lounge and a couple pops of fall color in your textiles! Speaking of cocktails, Snake Oil Cocktail created two delicious fall libations infused with culinary perfection: London Calling and Ginger Peach. Loren of Four Things Paper designed a watercolor cocktail menu featuring two precious pups. We love when couples include their pets, hobbies, or history into their wedding signage, so of course we couldn’t resist doing so for this editorial. 

Moving onto bridal looks, I always believe that the season doesn’t have to dictate your dress. If you want long sleeves in summer or a strapless, fitted gown in winter, go for it! I pulled over a dozen bridal looks from my bridal boutique, The White Flower, to show just how beautiful any silhouette or sleeve style can look against a fall palette. At the end of the day, brides should choose the dress that best suits their personality and comfort rather than focusing too much on “matching” the gown to the season or venue. As an avid fashion lover, I totally have to suggest that if you’re torn between two gowns and perhaps have more room in your budget due to downsizing your guest count, by all means get two dresses! If you do, plan extra time in your timeline for portraits in both looks! In case you’re still on the fence about hosting an intimate, micro wedding, know that there are so many benefits of doing so compared to hosting a larger event. Likely the most meaningful is that you’ll have much more time to spend with each guest. Weddings go by SO fast and if you have 200+ people, odds are you might not be able to talk to every person and you might feel stressed trying to make your way to as many people as possible. Second, your budget will have much more of a positive visible impact on your design and decor, especially with your flowers. Spreading your floral budget across 4-5 tables will give you much larger arrangements than using that same budget across 15+ tables. Lastly, in the time of the pandemic, you’re making a much more health-responsible choice by having far fewer people at your event since we have no idea when the virus will be eradicated. Less guests means less risk and will likely put your crowd more at ease!

Photography: Cavin Elizabeth Photography | Film: Goodman Film Lab | Floral Design: Studio Fleurish | Reception Venue: Julep | Shoes: Bella Belle | Jewelry: Twigs & Honey | Jewelry: Brides And Hairpins | Bridal Boutique: The White Flower Bridal Boutique | Cocktails: Snake Oil Cocktail Co. | Floral Arch Rental: Enticing Tables | Furniture Rentals: To Be Designed | Gown Designer: Essense of Australia | Gown Designer: Kelly Faetanini | Gown Designer: Marchesa | Gown Designer: Netta Benshabu | Models: Shamon Freitas | Paper Goods: Four Things Paper

You’re Going To Want to Check Out These New Getting Ready Gifts For Your Girls from Birdy Grey!

I am a huge fan of Birdy Grey bridesmaid dresses…affordable, the best color palettes and the best styles for all of your girls! Now (like launching today!) Birdy Grey has something for your best gal pals! We introduce to you their brand new getting ready gifts – bridesmaid robes, PJ’s and because 2020…masks! Spun of ultra soft matte satin, they’re perfect to wear for photos in the bridal suite, and they’re even perfect for them to wear after! Take a peek below and let us know which design is your favorite!

Made of 100% Polyester Satin Crepe De Chine and digitally printed, these getting-ready gifts were co-designed with customers through a series of Instagram polls! How cool?! They are available in two prints; Pink Orchid and Sage Eucalyptus and I know I can’t decide which I like more! These are the perfect gifts for your #idocrew and the holidays just so happen to be coming up!

Karen Bridesmaid Robe – $29
Pink Orchid | Sage Eucalyptus 
A soft, silky kimono-sleeved bridesmaid robe with tie closure!

Jonny 2-Piece Pajama Set – $39
Pink Orchid | Sage Eucalyptus
A short-sleeved button down mens top with matching tulip-hem shorties.

Bridesmaid Mask – $10
Pink Orchid | Sage Eucalyptus
Soft, silky and weightless on the face, a necessity during these times, so why not make it pretty?!

Head on over to Birdy Grey and start your gift giving early! We promise you, your girls won’t be disappointed with these gorgeous gifts!

Getting Ready Gifts: Birdy Grey

How One Couple Used Style Me Pretty Products to Transform Their Last Minute Wedding at Home

For all of you ‘COVID brides,’ this is one you’re going to want to read! Rather than cancel their big wedding, this couple opted to say I Do at the brides family home, surrounded by their family and the fruits of their labor – a true family affair as they all came together to make the day possible! Brooke Allison Photo was there to capture it all from all of the local favorites to the surprise car parade for the bride and groom. Decorative florals were gathered from around the home and the bouquet was crafted by White Moss and Twigs and the other decor….well, that just so happened to be done by Style Me Pretty products! Check it all out below, and be sure to read all about each and every special detail of this magical day!

From the Bride…On June 20, 2020, Sydney and Caleb’s family gathered to celebrate their wedding at the bride’s parents’ house. It wasn’t the wedding they had been planning over the last year ( in fact it wasn’t planned for at all until a month before the wedding) but both family pulled together, to pull of this amazing home wedding in Newport, RI.

At the beginning of May, when it became obvious their large wedding would not be able to take place, the bride’s father suggested using a side room in the family’s historic farmhouse. It was a large round room with 12 ft ceilings and a beautiful stone fireplace in the middle. The only problem was the room was unfinished. Prior to the family moving into the farmhouse, the room had been gutted and it had not yet been refinished. Her father was undeterred though and over the next couple weeks, her fiance, her brother, and her dad worked together to complete the drywall, reface the fireplace, paint the ceiling and walls, and put in new light fixtures. On June 18th, just two days before the wedding, it was finished.

From here, the bride and her mother took over planning how to decorate. The mother of the groom had drawn a beautiful wedding crest that was meant to be used on the invitations, and they used this crest as the inspiration for decorations. It was a romantic yet cheerful crest, filled with soft pastels, roses, and shades of blues. The bride and her mother walked around the neighborhood asking neighbors for permission to cut some of their garden roses. Because of COVID, no florist would sell flower petals so they gathered them from under bushes around the yard.

Earlier that year they had bought small potted olive trees to use as extra centerpieces at the original wedding, but now they took center stage amidst a flurry of votive candles and under the twinkling Christmas lights. The bride and grooms seat was marked out by Style Me Pretty “Bride” and “Groom” signs as well as SMP gold champagne glasses.

From the barn in the family’s backyard they hung SMP’s “Together is my favorite place to be” banner, a saying that seemed especially meaningful for such an intimate family wedding. And it truly was a family affair! The groom and his brothers set up tables in the backyard, small pop up tents, and hung Christmas lights from the shed. The bride’s brother, the mother of the groom, and the sister of the groom decorated the ceremony room, and the maid of honor (Sydney’s sister) decorated the master bedroom for a “getting ready” suite. The bride herself made the “Wedding Schedule” sign on a mirror from her old dorm room, calligraphed small signs to hang around the property, and designed the programs. When all was done, it was hard to tell if the beauty came from the details or the love that the family had poured into it.

Outside the door to the ceremony room was the framed crest alongside the mirror, the programs, and a SMP card box. The doorway was framed with two potted blueberry bushes, a nod to Caleb’s home state of Maine while all the flowers inside the ceremony room came from around Sydney’s neighborhood. The bride’s bouquet, the boutonnières, and corsages were all provided by White Moss and Twigs. Music was played by the groom’s sister as the family gathered in the room and during the procession (which started at the top of the stairs just outside the room and stopped in front of the fireplace).

After the ceremony the bride changed out of her ballroom style dress into a more casual and fitted dress. Upon exiting the house, the newly married couple were surprised by a parade of friends driving by with congratulations and well wishes. During cocktail hour the family mingled in the backyard; the older member of the family played corn hole, relaxed and chatted on patio lounge, and enjoyed appetizers while the younger ones swung around on one of the tree swings or the zip line.

Because it was a day of two families coming together, they wanted to acknowledge both families’ home states in the food served (Rhode Island and Maine). So for specialty cocktails, they served Rhode Island favorite, Del’s Lemonade (kept in white coolers the bride had hand painted for the occasion) with a vodka mixer, and for dinner they had a lobster boil.

One request of the bride, was there had to be some sort of French fries, but the bride and her mother where they could order so many French fries from. One week before the wedding, while the intended couple and the bride’s parents were eating out at a local restaurant, the bride and her mother commented on how good the tator tots were. On a whim, the bride’s mother asked the chef if it would be possible to order tray of them to go for the following weekend, and were pleasantly surprised that they could! For dessert the mother of the groom made ice cream sandwiches, and the couple’s cake was from Greggs (a local favorite).

After dinner, the families moved back inside to the ballroom for the couple’s first dance and cake cutting; which then lead to everyone joining the dance floor as the bride’s sister played dj. After all the dessert had been eaten and everyone was worn out from dancing, the two families gathered together in front of the house to send off the new couple with a sparkler exit. It was a beautiful ending to an entire day celebrating not just two individuals but two families coming together. Every single person had helped and played a part in the day, and because of that every detail had extra meaning.

[iframe http://player.vimeo.com/video/450924410 600 338]

Photography: Brooke Allison Photography | Videographer: Jared Cicichelli | Florist: Whitemoss & Twigs | Wedding Dress: Spark Bridal Outlet | Cake: Greggs Restaurant | Brides Shoes: Kate Spade | Rings: D.Cole Jewelers | Hair: Shelby White | Ties: Summer Ties | Groom's Attire: Ralph Lauren | Banner: Michaels | Bride and Groom Place Set: Michaels | Bride/Planner: Life in the 31 | Cake Plate and Fork Set: Michaels | Card Box: Michaels | Chairs: Quality Rentals | Champagne Flutes: Michaels | Cocktails: Del's Lemonade | Decorations: Style Me Pretty | Dinner: Tony’s Seafood | Door Sign: Michaels | Maid of Honor Dress: Lulu's | Mother of Bride Handkerchief: EmbroideryWord | Mother of the Bride Dress: Talbots | Reception Dress: Lulu's | Ring Box: The Mrs Box | Tater Tots: MainSail | Wedding Crest: Terry Reed

Pastels, Organic Blooms and a Dreamy Meadow: This Editorial Is for the Feminine Brides-to-Be

Blending couture details with a natural setting, Janna Brown Design Co. created garden-inspired wedding magic at Serenbe Farms. From the bride’s ethereal gown adorned in floral appliqué to organic arrangements in a soft, neutral palette – this shoot has so much pretty to go around. To get inspired by every last detail of today’s editorial, don’t forget to head on over to the full gallery, all taken by Lost Coast Photography!

From Janna Brown Design Co.Inspired by the pastel tones and femininity of a garden-inspired floral linen, this editorial hosted by Janna Brown Design grew to exude an organic aura while intentionally blending couture details with a natural setting. 

Serenbe Farms set the backdrop for our day, while the horses grazed in the distance, and the breeze rippled through the tall grass. Our bride boasted an impeccable dewy makeup look by Katie Gurley Artistry, that set her aglow, while donning an exquisite gown by Dana Harel Design. 

Envisioning a tablescape in a wild scene of an overgrown meadow, we built layers of florals upon the linens, with thoughtfully curated paper goods by Plume Calligraphy, and floral arrangements in a perfectly paired palette, brimming with seasonal blooms. From delicate tendril sketches on the paper suite, to the floral appliqué on the bride’s cathedral veil, we aimed to paint each scene with a splash of floral detailing.

Photography: Lost Coast Photography | Design: Janna Brown Design Co. | Floral Design: Janna Brown Design Co. | Wedding Dress: Dana Harel | Invitations: Plume Calligraphy | Hair & Makeup: Katie Gurley Artistry | Groom's Attire: Street Tuxedo | Accessories: BHLDN | Linen: BBJ La Tavola | Location: The inn at Serenbe | Rentals: Liberty Party Rental | Veil: Lauren Leshansky

These Vendors are members of our Little Black Book.
For membership information, click here
The Perfect Blueprint for a Brunch Wedding Inspired by the English Countryside

“Tea time, with modern details” explains Chic by Nicole of the inspiration behind today’s editorial… I mean, does that not sound like the most charming event theme ever!? Complete with a custom watercolor and toile print created by Ashley from Floraison Co, dusty blue and blush hues and organic blooms by Forever Wildfield – to sum things up, this shoot is drop.dead.gorgeous. Don’t miss out on the full gallery of details, all taken by Will Reid Photography!

From Chic by Nicole… This shoot was inspired by two of my favourite things: Brunch and English Gardens. We incorporated one of our favourite British traditions, tea time, with modern details to bring the English vibe to another level.

Dusty blue has definitely been an “it” colour for weddings this year. When designing this editorial I mixed dusty blue tones with our favourite colour, blush! The custom watercolour and toile print created by Ashley from Floraison Co. were just the icing on this editorial cake. To keep the table soft and airy, it was set with a silk ivory linen which allowed the romantic tones weave together on a neutral backdrop.

For the florals, we kept the arrangements and bouquet organic and free flowing in order to compliment the fine art vibe of the shoot. We kept the colour scheme in mind and complimented with blush and white flowers as well as luscious greens to accent the table.

Photography: Will Reid Photography | Videography: Anton Park Films | Floral Design: Forever Wildfield | Cake: Truffle Toronto | Reception Venue: The Doctor's House | Shoes: Bella Belle | Jewelry: Blair Nadeau Millinery | Rings: Stor by Margot | Catering: Elle Cuisine | Embroidered Napkins: The embroidered napkin Company | Fascinator: David Dunkley | Gowns: The Modern Bride | Hair Extensions: Sparkle Hair Extensions | Hairstylist: Shannon Petrolito | MUA: Daneille Mattis | Model: Dulcedo Models | Planning: Chic by Nicole | Planning, Design and Creative Direction: Chic by Nicole | Rentals: Simply Beautiful Decor | Silk Ribbon: Stella Wolfe | Stationer and Watercolor Artist: Floraison Design Co | Teaware: Teaspoon Events | Vintage Rentals: Cre8ive Studios | Vinyl, table runner and Backdrop: KV Print Bar | Wax Seals: Kathryn Hastings & Co.

Your Thanksgiving Timeline from One Week Out

Welp. We are kicking off the 7 day countdown to Thanksgiving (plus or minus a few days depending on when you stumbled upon this awesome post). And with this year looking a little different from years past, it’s more important than ever to make sure we are organized, energized and ready to kick some Turkey Day ass. Because there is nothing we need more in #2020 than a beautiful, seamless, totally happy day to remember that gratitude for the ones we love is the only center stage we need. And a really good meal. With wine.

photo by Sugar & Charm

7 days out

Tidy Up and Take Inventory. Start off with an entirely clean slate. Nothing get’s you in a better planning state of mind better than squeaky clean countertops and tidied up pantries! While a good scrub down by a pro is always welcome, if you are keeping your doors sealed during Covid, just focus on the areas that you and your guests will be using. And if you have time, trash any items in your fridge and pantry that you don’t need – this will both free up space for your groceries and will free up any tupperware or containers you might need. Plus, you will actually see what you have and what you need to buy.

Order a turkey. Grocers can’t guarantee you a turkey if you don’t reserve one in advance. So just do it! You’ll feel better and will avoid a turkey travesty. Many places allow you to order even further out so call today and check that box.

Confirm your guest list. This is important for two reasons. First, you want to make sure that you plan for enough food and place settings for your guests. Second, you want to check for food allergies and/or dietary preferences.

photo from: reDesign Home

6 days out

Design Your Menu. Now that you have your guest list set and you know all of your food allergies and/or preferences, it’s time to consider your menu. Make a list of your final recipes, from apps + snacks all the way through to dessert. Take note of cooking times, how much stove space you have, etc. You don’t need to finalized the timing per se, but you need a strong sense for where there might be some logistical problems.

Divvy up responsibilities. Remember the problems mentioned above? Here’s how you solve them. Align your guests and their unique personalities + dietary wishes with a dish that they could bring. Do you have a sister who is always early? Ask her to bring an appetizer. A mom that is always late? Let her bring the dessert. Know that your stove might be overwhelmed with a side dish or two? Divvy those out to your brother and make sure he brings them in a crockpot. It is also not a bad idea to ask guests with dietary restrictions to bring a dish or two that both works for them and is delicious for everyone – making sure to give them plenty of time to brainstorm and shop for ingredients.

Create your cooking and entertaining blueprint. This is so important. It is the make or break between a frantic, totally untimed day of cooking and a seamless, stress free celebration. Pull out every single serving dish that you will need and place a sticky note on it describing what it will be used for. Make sure each dish has a serving utensil. If you are embracing your inner type-A, rinse and repeat with the pots and pans that will be used to cook each dish, the plates, wine and water glasses, pitchers to fill said wine + water glasses, the flatware, everything. Lastly, before you tuck in for the night, create your cooking timeline. I use an excel spreadsheet because I’m insane but you could also just note general cooking times on a piece of paper.

From the Style Me Pretty Harvest Collection

5 days out

Make a master grocery list. Since you have already written out links or bookmarks to all of the recipes that you will be cooking, it’s time to pull out the ingredients and make your master grocery list. Don’t assume you have anything – salt, butter, olive oil, these staples get depleted quickly when cooking a feast. Make sure you remember to add the items that won’t be in your recipes – wine and/or cocktail ingredients, sparkling waters, rolls, anything that you might be purchasing and not making.

Take stock of tupperware. Leftovers are as important as the meal itself. And if you are heading to the store anyway, you may want to pick up some tupperware packs so that you aren’t left scrambling to pack everything up when you are exhausted and likely a little tipsy.

Pull Out the decor. Even just a small gesture of intentionality for decor can make all the difference! Plus, it’s a great excuse to bring out alllll the pumpkins. Take inventory of what you have and what you need. If you need candles, for example, it’s tempting to procrastinate purchasing them today when you can do it in the next few days. But 5 days is really the minimum you want to place your amazon order or hit up the stores. So knowing what you have and what you need is key this year.

From the Style Me Pretty Harvest Collection

4 days out

Polish, buff and repeat. Make sure your flatware, dinnerware and serving pieces are clean and in tip-top shape. This is one of those naggy to-do items that you really don’t want to save until the day of. Pop on that Hallmark movie and get to work. OR even better, this is a great job for kids and spouses.

Visit the grocer or order online. As most Thanksgiving meals tend to have a common thread (for example, everyone will need butter, sour cream, and milk), purchase as much from your master grocery list as you can. This way, you’ll have time to visit another store if needed, and/or visit the farmer’s market should you so choose. Note, that this year, we would suggest going at least 4 days out. Further, as you know, groceries are limiting space inside so unless you want to wait in line for 2 hours, avoid peak shopping times at all costs (basically anytime after 4PM or on weekends). Consider ordering the bulk of your supplies online extra early and filling in the gaps as you need to.

photo by Alyssa Rosenheck

3 days out

Make a playlist. Let’s face it: parties are simply more fun when there’s a little music in the background! Prepare a playlist of upbeat songs or Holiday favorites to get everyone in a festive mood. This is a great task for the other members of your family to help with and even if it goes totally off the rails, it can be a fun conversation starter…hahaha, this is my 16 year olds all metal playlist that then seamlessly blends into your husband’s jazz playlist.

Take a bubble bath. Now that your place is spotless, the turkey is ordered, guest list solidified, menu is prepared and you’ve jammed out for an hour, you should feel pretty darn good. Do something nice for yourself- it’s an order!

photo from: Leila Brewster

2 days out

Shop for flowers and design your arrangements. If you are having a floral centerpiece, today is the day you will want to snag those. We often just use greens from our yard with candles but it is definitely nice to have something even more robust if you have the creative energy. Small arrangements in the bathrooms, entry hall and sprinkled throughout the buffet are also such a lovely touch that transform your house from standard to special.

Iron your linens. We know it’s a pain, but the last thing you’ll want on your pretty tablescape is creased napkins! So, take a bit of time to make sure that your linens look nice and neat- you won’t regret it.

Set up Your Chairs. Wherever you plan to be, today is the day to set up your exact seating arrangements.

photo from: Abby Capalbo

1 day out

Be your own sous chef. Chop your carrots, onions and celery. Prep the herbs, grate your cheeses. Peel and chop your potatoes, then submerge them in cold water in the pot you plan on cooking them in. It’s the little things that will save you a ton of time tomorrow. Anything and everything that you can prep, do it. I like to store things in plastic baggies so that I don’t waste any precious tupperware.

Set the table. Yesterday, you prepped by ironing linens. Today, it’s time to set the stage. Make sure each place setting is complete, the glasses aren’t chipped, and everything is in decent shape.

Make your pie. While a fresh pie is things that Thanksgiving dreams are made of, cooking a pie on the same day that you are cooking 75 other things is a thing of nightmares. Gather the family and get to baking.

Shower and blow dry your hair. No matter how much you’ve prepared, Thanksgiving is going to be crazy! If you can, take a shower and blow-dry your hair. You’ll save a bit of time tomorrow when the madness begins. My secret for refreshing a day old blow out…a touch of dry shampoo and either a curling iron or another quick run thru with the dryer.

photo from White Loft Studio

THANKSGIVING

Start early. You did absolutely everything you did to get this day prepped in the most organized, efficient, fool proof way possible. But that doesn’t mean that “ugghhhhhs” won’t still happen. Start early, go in with an open mind and a sense of flexibility and today will be wonderful. And if all else fails, refer to our Master List of Thanksgiving Mistakes and how to quickly + easily fix them!

How to Pull off the Microwedding of Your Dreams? It’s All in the Details.

Think you can’t still have the wedding of your dreams during COVID times? Enter microweddings. Today’s gorgeous shoot from Sweetly Southern Events highlights all the beauty and plus sides that come with hosting a microwedding. That downsized guest list means more room to splurge on an insta-worthy floral arch, handcrafted details and personalization at every turn. To see all the inspiration this whimsical editorial has to offer for your Big Day, head on over to the full gallery – taken by e.losinio photography!

From e.losinio photographyCombining the natural beauty and high end details, Sweetly Southern Events sought to draw out the plus side of a microwedding and highlight the beauty in a time of darkness. She designed a color palette of soft peach, blush, muted green, and gold accents. Every detail was perfectly crafted to highlight the beauty of a micro wedding; from the handcrafted stationery pieces from Tortoise Designs to the custom hand painted backdrops provided by Lindale Studios. 

For the table design, Sweetly Southern Events, set an intimate table setting with a wispy blush runner that ran right down the middle of our Something Vintage Rentals’ Brentwood farm table. The couple selected high-end end Louis French-styled upholstered chairs with crisp natural linen fabric and two Carved His and Hers Chairs. Real-life couple Shanda and Jonathon were excited to celebrate their anniversary with a short vow renewal while supporting local wedding vendors in bringing this inspiration to life. 

There was not a dry eye in the room as they each shared handwritten vows preserved for years to come in beautifully crafted vow books by The Art of Etiquette. The bride wore a Watters gown from Bridal Elegance which was chosen for its simple yet elegant composition. The sheer sweetheart bodice fit and flare was the perfect touch of classic yet modern. Hair and makeup were completed by the talented Styled for Elegance and Beauty by Brigid. Her bouquet, a signature piece for JR Flowers, included pops of peach, white, and blush roses. The relaxed, modern, and romantic feel of the wedding gown and bouquet reflected the personality of the bride that Sweetly Southern Events hoped to capture.

[iframe http://player.vimeo.com/video/453348391 600 338]

Photography: e. losinio photography | Videography: Alex Mangione Photography | Event Planning: Sweetly Southern Events | Floral Design: JR Flowers | Wedding Dress: Bridal Elegance of VA | Stationery: Tortoise Designs | Makeup: Beauty By Brigid | Hair: Styled for Elegance | Backdrop: Lindale Studios | Creative Space: A Wedding Loft | Historic Mansion: Rust Manor | Model: Flor de Casa Designs | Rentals: Something Vintage | Vow Books: The Art of Etiquette

A Garden Filled Ballroom Wedding At Arlington Hall At Turtle Creek With The Perfect Amount of Southern Charm!

How does that saying go…’more is more?’ Today’s wedding featured exactly that when it came to florals! Something Pretty Floral filled Arlington Hall at Turtle Creek from top to bottom with beautiful blooms like the jaw dropping floral chandelier and stunning centerpieces! Engaged Events brought these college sweethearts wedding day to life with not a detail left undone including a custom wedding crest to a surprise firework send off! Check it out below to see how Stephanie Brazzle captured the day oh so perfectly and how the couple’s furry friend stole the show!

From Stephanie Brazzle PhotographyMeredith and Parker were married at Preston Hollow Presbyterian Church followed by a magical tented reception at Arlington Hall Turtle Creek. These college sweethearts wanted to bring their families from coast to coast, allowing guests to meet in Dallas to celebrate their marriage.

When they brought on Whitney Bailey with Engaged Events, she was able to design and execute their vision of garden meets ballroom. The wedding was filled with the perfect amount of southern charm throughout the evening from hanging florals to beautiful tablescapes.

Guests enjoyed dinner under a clear tent which held a thousand twinkle lights and a gorgeous floral halo provided by Something Pretty Floral. Following dinner, guests would head inside the mansion to dance the night away with music provided by Downtown Fever.

The couple and their guests ended their night with a surprise firework show overlooking Turtle Creek that shocked all of their guests before they hopped in their getaway car! 

photography: Stephanie Brazzle Photography | videography: Jonathan Mayfield Media | Event Planning: Engaged Events | Floral Design: Something Pretty Floral | cake : Panini Bakery | Invitations: Emily Mayne Studio | Bridesmaids' Dresses: Nordstrom | hair and makeup : Q Makeup & Hair Artistry | lighting: Absolute Entertainment | band: Limelight | tux : The Black Tux | transportation: Blue Diamond Limousines | venue : Arlington hall | wedding venue: Arlington hall | Rentals: Perch Event Decor Rental | Rentals: Posh Couture Rentals | accommodations : Hotel Crescent Court | linen: BBJ La Tavola | reception dress : Warren Barrón Bridal | wedding dress boutique : Stanley Korshak Bridal Salon

Simple Ways to Add a Major Dose of Personality to Your Wedding Invites With Embellishments

We’ve written countless editorials on how epic an impact the small, finishing touches make on your wedding day. From the bridal suite ‘prepping’ paraphernalia and the backdrops beyond your altar to the signage that subtly nudges your squad to get into the nuptials spirit and the Mr. & Mrs. banners reminding you that this is a BIG day, these little details really, really make a big difference.  At Style Me Pretty, we’re obviously huge admirers of high-touch tailoring and poignant personalization going into wedding planning, so if there’s a way we can help amplify the aisle styling, you know we’ll always take it! 

Let’s start at the beginning, though, because making your wedding day your own doesn’t just happen that day; rather, it evolves over the course of your engagement and translates into sweet, creative complements to your love story. Your partner finds a ring that perfectly captures your essence (and you say ‘YES!’), then you move onto deciding on the date and time, locale and overall look of your ‘I Dos,’ then comes a color palette, your bridal party, the vibes of your vows, ALL the things that will come together to create your special day and everything is conducive to your own, signature stamps. 

Speaking of stamps… your invitation is the prelude to all the merriment that is to come, so of course you could say that there’s a lot of anticipation leading up to its arrival in you guests’ mailboxes. Will it be bold and trailblazing, classic and full of charm, fashionable and exclusive-feeling, modern and arrestingly-chic, or romantic and ethereal in interpretation? Everything in your suite, including the invitation, the response card, the all-purpose card, will be pretty standard, in form, but the templates each tell a story and foreshadow little Easter eggs that will show up at the wedding in unique ways. 

Much like the way everything at your event wraps up in a perfect little bow (and actually, no, there isn’t a ‘perfect,’ there’s just intention and branding and a rhythm, rhyme and reason for doing things the way you do), your invitations deserve the same kind of attention and thoughtfulness. Custom stationers can assemble your suite with artfully-designed inserts or pockets that package up all of your important pieces of correspondence; if you’ll be doing the invitations on your own, though, you can put a stunningly-bespoke invitation bundle together very easily using Style Me Pretty’s embellishments.

Photo by Natalie Broach Photography


Ribbon says…

Soft, feminine, and full of romance – unwrap for a modern fairy tale, for all intents and purposes. We have four hues that harmonize oh so well with the modern wedding palette: blush, gray, dusty blue, and white and they can be tied in a high-brow,  lavaliere-style bow, in a cleaner and delicately-cinched knot, or like a present, fashioned into a symmetric bow and joined in the middle with a beautiful wax seal. If you choose to go with ribbon, we recommend purchasing a few extra spools to style your flat lays with. 

Photo by Lucy Munoz Photography


[Cotton] Cording says…

Subtle, fashion-forward, and utterly refined – the look is pretty much like disrobing poetry (if we could take a page out of Netflix’s Emily in Paris). The four color iterations of gold metallic, pink, black, and white cotton cording can literally go with any kind of assembled ensemble be it a watercolor floral wash, a modern black-and-white play, or a soft neutral in need of an elevating-metallic motif. They offer but a whisper of texture and intrigue, but still mesmerize with their mark.

Photo by Jose Villa


[Suede] Cording says…

Festive, rustic or bohemian, and adventurous in spirit – the suede twine tie-up conjures a degree of seasonality and imaginative creativity (anyone else reminded of a treasure map?!).  Available in just two versatile colors, pink and tan, the magic in these combinations is in their texture (they can be tied alone when they’re sent in the mail or used to affix some natural element like greenery when you style your day-of flat lays).

Every Style Me Pretty invitation suite is sublime in its own right, but when you add one or more of our enchanting embellishments, you’ll be making a statement that sticks with your guests (and not just on their refrigerators!). Shop now! And check out our Style Me Pretty Ultimate Stationery Guide for everything you need to know about wedding invitations (when to send them out, what to include, etc.)! 

Photo by Molly Carr Photography

These Vendors are members of our Little Black Book.
For membership information, click here
A Quintessential New Orleans Wedding, Complete With A Second Line At Il Mercato!

For today’s tried and true New Orleans wedding, captured by Clary Pfeiffer Photography, included everything from a champagne wall to a Second Line with nearly 100 of the couples guests parading through the streets! Held at the Il Mercato, the couple tied the knot, surrounded by friends and family and overflowing florals by Giverny Design, all planned by Ruby and Pearl Events. Take a look below and grab a pen to add ‘champagne tower’ to your wedding to-do list!

FromClary Pfeiffer Photography …Laura & Kevin’s destination NOLA wedding was a mix of fun and classic – the couple celebrated with a Second Line parade for their guests welcome party and a Champagne Tower for the wedding reception after their vows in the rain.

From the Bride…We said “I do” in New Orleans, Louisiana. Long before our wedding day, we felt a connection to the city as a couple — and now having begun our marriage there: New Orleans will forever hold a grip on our hearts.

We welcomed guests from over the country (and world) to partake in an extended weekend with us in the Big Easy. We kicked off celebrations Friday for our rehearsal dinner, followed by a Second Line parade through the French Quarter: which is a quintessential tradition in New Orleans. Nearly one hundred of our wedding guests paraded through the city’s historic streets to the sound of brass musicians the evening before the main event on Saturday.

Our wedding day was a beautiful, magical blur for Kevin and me — surrounded by our loving parents, family, friends, bridesmaids, groomsmen, and pastor from my hometown. The Garden District provided a truly special setting for our celebration, which felt romantic, lush, and fun.

Photography: Clary Pfeiffer Photography | Videographer: Brooke Boyd Photo + Film | Event Design: Laura Platt | Event Planning: Ruby and Pearl | Floral Design: Giverny Design | Wedding Dress: Pronovias | Cake: The Royal Cakery | Invitations: Scriptura | Ceremony Venue: Il Mercato | Ceremony Venue: Il Mercato | Bridesmaids' Dresses: Jenny Yoo | Catering: Joel Event Catering | Makeup: Lynna Vo | Calligraphy: Calligraphy By Maria-Helena | Groom's Attire: Tuxedos To Geaux | Ceremony Band: Kinfolk Brass Band | Reception Band: NOLA Dukes Band | Rehearsal Dinner Venue: Brennan's | Rentals: Luminous Events

These Vendors are members of our Little Black Book.
For membership information, click here
An Interview with the Reigning Queen of #PieArt

Did you know that 9% of Americans choose to eat their pie crust first, before they start in on the filling? And did you know, that when asked if one would prefer a friend, a family member or a pie as their plus one, 29% chose the pie? Just kidding, I made that last bit up. But the first fact is definitely true (according to the internet) and is precisely why pie making, and more specifically #pieart, has become something of a fan-sport. It’s the intricate layering of exquisitely cut dough, the intentional design, the gentle browning until the color is just so, such that when pulled from the oven, the pie just might resemble something you would frame and hang in your house. Yep, that’s #pieart.

And today, we are getting down and dirty with the reigning Queen of instagram’s most liked pies, the lovely and crazy talented Helen Nugent. Founder of the gorgeous Pie-Eyed Girl blog, the cult followed instagram account @BatteredNBaked and the stunning new book on pie artistry, Pie Style. And get this. Helen is a home baker, no formal training at all. Which means that this is SO doable for any of us that consider ourselves pie fancy. Anyway, grab a cider, pull on those cozy socks and read on to discover the tips and tricks that Helen is so graciously spilling with all of us budding pie-artists!

SMP: Let’s talk basics. Can you tell us about your pie-making toolkit? What is inside and what do you rely on most to execute your designs?

HN: There are LOTS of tools because I’m a gadget fanatic! These are some of my favourites that I list in my book. Here are my top 12:

  • Baking Steels/Pizza Stones/Baking sheet. I love baking steels because they provide a consistent, even heat that helps crisp up the base of the pie before it has a chance to absorb any juices and cause a soggy bottom. Pizza stones also work well but they don’t store as much heat as a baking steel, and cleaning up spills can be messy. A third option is a preheated baking sheet. While it will not get as hot as a steel or stone, it will definitely help prevent that filling from breaking through to the bottom of your pie.
  • Cookie Cutters. Cookie cutters are an easy (and inexpensive) way to pretty-up any pie top. With so many beautiful cookie cutter shapes to choose from, from tiny flowers and geometric shapes to realistic leaves and novelty shapes, they’re an easy and inexpensive way to create a stunning look for your pie.
  • Craft Paintbrushes/Pastry brushes. Craft paintbrushes make excellent (and inexpensive) egg wash tools. I especially love the little, thin ones that can get into all the nooks and crannies of my pie decorations. Just make sure that the brushes you use haven’t been used for any non-food related tasks. If you choose to go with a pastry brush, look for one with soft, natural bristles rather than silicone ones which won’t give you an even wash.
  • Digital Weight Scale. When I teach people to make pie, one of the first things I encourage them to buy (after a rolling pin) is a digital weight scale. Unlike measuring, when you weigh your ingredients you get the same result every time. Recipes are easier to scale up and down accurately. The best part of a digital scale is the ‘tare’ feature which resets the scale to zero. This allows you to weigh all your ingredients in one bowl, simply by hitting tare between each addition.
  • Food Processor. A food processor is my go-to for making pie dough. Why? Because it has the power to make anyone a pastry hero. Really, it’s almost criminal how easy it is. That’s not to say you can’t make pie dough by hand or with a stand mixer but you can do it faster and with more consistent results with a food processor. Look for a processor that has at least a 10-cup capacity so it can easily accommodate pie dough for a double crust pie.
  • Hobby or Utility Knife. A sharp hobby or utility knife with replacement blades is one of the handiest tools you can have in your pie toolbox. With a fine tip and beveled edge, you’ll get sharp, accurate cuts in your dough and better control than a standard paring knife can provide.
  • Impression or Embossing Mats. Traditionally used by cake decorators for fondant-based cakes, impression mats are great for giving your pie tops a “one-of-a-kind” look. Some of my favorites designs include lace patterns, delicate flower designs and wood grains. Available in a variety of sizes, the best mats are made from silicone, which tend to have the deepest impressions so they hold the final design.
  • Multi-wheel Stainless Steel Lattice Cutters. Five to 7 wheel lattice cutters are real time savers, letting you cut multiple and consistent size strips of pastry dough every time. And because the lattice wheels are adjustable in size, you can cut your strips as narrow or as wide as the cutter will allow.
  • Off-set Spatula. An off-set spatula is one of my favorite pie decorating tools. I use it to transfer pastry cut-outs and other decorations from my work station to my pie without worrying about warming them with my hands or bending them out of shape. It also does double-duty as a tool for smoothing the tops of curd and meringue pies and getting filling into every corner of a tart pan, My favorite offset spatula has a 4 ½-inch blade.
  • Rimless Baking Sheets. A rimless baking sheet is my go-to when making pies. If I’m building a pie top off the pie, and want to move it to the refrigerator, I can slide the design, parchment paper and all, onto it without disturbing the design. It’s also large enough to hold a variety of cut-outs and decorations so I have fewer pans to juggle in and out of the refrigerator.
  • Rolling Pin. I use the classic variety of rolling pin, called a Baker or American rolling pin. It has a cylindrical wood barrel that rotates around a rod, fitted with ball bearings, and a handle at each end. This is my personal favourite because it is comfortable to use and the ball bearings allow for smoother, longer rolls. It’s also the type that I’ve been using all my life so the one I feel most comfortable with.
  • Ruler. An 18-inch, clear, plastic ruler is invaluable for everything from determining the width of lattice to setting a straight edge. Silicone Rolling Mat. These non-slip mats feature a handy imprint of circles in several different diameters and ruler markings up the sides to help you roll your pie dough to the correct size.

SMP: Do you have a favorite pie plate that yields the perfect pie crust?

HN: I think that, at the end of the day, the best pie plate for you is the one you reach for most often. I love affordable, dark metal plates because they conduct heat rapidly and consistently and give me a crisp, evenly browned crust. Glass pie plates are another good choice as they also conduct heat evenly with the added bonus of being able to see your bottom crust browning. I also love tart tins, especially ones with removable bottoms. They’re great for curd and fruit tarts but I also like to use them for pies. Yes, perhaps it’s a bit unconventional but you can bake a pie exactly the same way in a tart tin as you can a pie pan and you get the added bonus of having a variety of shapes to choose from … Plus really pretty fluted pastry edges to your pie!

SMP: Now, in my very not-studied mind, seems like there is always a bit of a debate on what type of fat to use in a pie crust. What is your go-to? 

HN: Salted butters vary in their salt content. For that reason alone, I use unsalted butter because it allows me to control the salt content by adding it separately.

SMP: Butter is better, got it. Do you ever use Cream Cheese, Shortening, Lard or Coconut Oil (or any other secret ingredient) in your dough? 

HN: I experiment with different types of pie dough all the time. My go-to is my All-Butter Pie Dough because it delivers the best combination of flakiness and flavour. I’m not a fan of shortening-only pie dough because it has no flavour (although it does deliver a lot of flakiness) unless its paired up with a really flavourfill filling like cranberry. I prefer to use shortening in a butter + shortening combo pie dough.

SMP: How thick do you roll out the base dough vs the topper?

HN: I tend to use ⅛-inch for both the top and the bottom layer. If the topper has a solid top and then decor like leaves or braids on top of it, I will roll the topper out as thinly as possible to make sure everything bakes evenly.

A handy tip for knowing if your pie dough is ⅛-inch thick is to stack two quarters on top of each other. That’s ⅛-inch.

SMP: How do you ensure the most beautiful golden color on your crust? Butter? Milk? Egg Wash? Sugar?

HN: I whisk together one egg yolk mixed with one teaspoon of hot water. Then I run it through a small strainer to remove the chalaza (or “stringy white things” as I like to call them). I end up with a beautiful, smooth glaze that I can apply evenly across my pie top. If I have time, I like to apply one thin layer of egg wash and then let it dry in the refrigerator for about 10 minutes and then apply one more layer before the pie goes into the oven.

The secret to an even golden colour is to apply it EVENLY and to take your time and and to get into all the nooks and crannies.

SMP: Blind Baking Crusts. Yes or no? And why?

HN: There are two types of blind bakes that I use — partial and full — and I use them in the traditional way. A partial blind bake is perfect for a pie with a filling that will go back into the oven to bake further (like a quiche). A full blind bake is used for cooked fillings like curds that do not require further baking. I know a lot of people swear by doing a partial blind bake for all their pies as a way of warding off a soggy bottomed pie and getting a crispy bottom but I find that to be very labour-intensive and not always practical.

The best way I know to prevent a soggy bottom is gently pre-cook your fillings on the stove (just until they begin to thicken) before adding them to the pie shell (cooled of course) and to freeze the pie before you bake it. That way, the filling doesn’t have time to seep into the crust before it has had a chance to bake.

SMP: 1/8″ dough, check. Nooks and crannies with the egg wash, check. But what about forming the dough. Is there a trick to getting each ornament or decorative piece to hold its shape? 

HN: The key to successful decorating is to keep your pie dough chilled. It should feel firm and cool before you start cutting, latticing or braiding. If your dough warms up as you use it, slide it onto a cookie sheet and return it to the refrigerator for about 5 minutes. A cold piece of dough will reward you with straight strips of lattice, less sticking and cleaner edges to your cuts outs. After your decorations are cut, keep them in the refrigerator until you need them. Because they’ve been kept chilled, they’ll be much less likely to rip, tear and flop.

SMP: I noticed that your pies all tend to differ in terms of the amount of coverage that they provide to the filling. Is your topper design dictated by the type of pie filling you are using?

HN: It’s more in the bake times. I want the filling and the top to be baked at the same speed, both finished at the same time. Every pie is different but it has gotten to the point where I know what will bake in the time I have in the oven, thus what type of top to use.

SMP: Do you generally bake your toppers separately or on top of the pie? Seems like tricky business to transfer a pie topper onto a pie!

HN: 90% of the time, I bake my toppers on top of the pie. For some, like pumpkin pies, I will bake the toppers separately and then place them on the pie. The main issue you have to deal with when you do this is shrinkage and distortion. I also make my pie toppers about 10% bigger than I normally would to account for the inevitable shrinkage you will get in the oven. On the odd occasion where it is too big for the pie when it comes out of the oven, I run a vegetable peeler GENTLY around the edges of the top to thin it out. This takes a bit of practice and a lot of bravery so might not be something everyone would want to tackle.

A good tip for preventing shrinking and distortion in a pie topper is to freeze the topper before you place it in the oven. The shape and decorations tend not to distort when they are frozen because the dough has already started to ‘set’ before it has a time to distort.

SMP: Your designs look as gorgeous after the bake as before. Perhaps even more so. How do you get that entirely even, perfectly golden hue without burning the smaller pieces? 

HN: If you are making a highly-decorative pie, the last thing you want to see is all your hard work go down the drain if it burns in the oven. Once my pie goes in the oven, I watch it like a hawk! I set a time to go off every 15 minutes during the baking phase so I can cover any pieces that are beginning to brown too quickly with little bits of foil. Yes, it does mean staying near the oven but is time well spent when you end up with a beautiful, evenly browned pie.

SMP: Do you have a good rule of thumb for baking times? 

HN: I think people underestimate how long you can leave a pie in the oven. The golden rule is “until the fruit bubbles in the middle” but I’ve seen many people pull it at the first sign of browning. Leave it in there until you are happy with the colour. It’s very difficult to overbake a pie (unless you forget about it all together).

SMP: In the hurry and rush of Thanksgiving, many people tend to bake their pies a few days in before the holiday. How far in advance can you make a pie and still have taste as fresh and delicious as the day it was made?

HN: For the freshest results, I suggest baking the pie on the day you are going to serve it but allow at least three hours for the filling to set before serving it. One of the most common complaints that people have is a runny filling but nine times out of ten it can be avoided if you give the filling time to set.

If time is an issue, you can also freeze a baked pie (just make sure you double wrap it in saran first) in advance. It will easily keep in the freezer for 3 months. When it’s time to defrost, leave it in the refrigerator overnight and then crisp it up in a 350F oven for about 15 minutes. You’ll have a hard time separating it from a freshly baked pie.

all photos by James Brand

SMP: We are talking a lot about best Covid practices for this holiday and hand pies / individual pies might be just the ticket. Are there any tips you have to ensure a delicious individual bake? 

HN: Hand pies and individual tarts are perfect for the times we live in. My tips for success include not overfilling the pies (1-2 tbsp of filling goes a long way), and thoroughly sealing the edges. You’ll also get a lot less leaking if you create a vent in each hand pie so steam has somewhere to go other than out the sides of your hand pie.

5 Must-Have Contract Clauses

From Magi Fisher, photographer and lawyer-extraordinaire:

One of the most common mistakes I come across in the wedding industry is the lack of attention paid to contracts. When you run a wedding photography business, contracts aren’t just a good idea – they’re essential. Not only do they protect you, but a thoughtfully composed contract makes expectations, services, and deliverables clear from the get go. This means your client knows exactly what they’re signing up for and can communicate any questions, concerns, or priorities before officially enlisting your services. Sounds ideal, right? Happy clients are good for business. This means you can’t just copy and paste some other vendor’s contract you happened upon and call it a day. It needs to be customized for you, your state, and your services. So pull out your current client contract and give it a good looksee. Here are the top five clauses you need to cover:

Travel

Don’t fall into the trap of thinking that the cost to travel to a wedding you’re shooting falls on you if it’s not a destination wedding. A wedding in your state might still be a two hour drive each way! Not only does that add time to your work day, but it’s also mileage on your car (hello, maintenance fees), gas, and possible tolls (I live on the Northeast Coast which is apparently obsessed with tolls). Make sure you are calculating and covering the real cost of doing business, which means every single client contract – not just the destination weddings! – needs to cover travel. So what should be included? Set a regional, national, and international fee system, and cover everything from mileage rates to accommodation minimums. Specify whether or not you need travel insurance and whose responsibility it is to pay for it. Spell out when the client can expect an invoice for travel fees and how long they will have to pay it. And finally, if there’s anything COVID-19 has taught us, travel can be unpredictable – and really stinking hard to get your money back. So a non-refundable travel policy works best!

Limitations Due to Venue Rules

What we put out into the world, from publications to our published portfolio, is the best of the best of our work. That’s just good business practices! But it also means that the work your future clients see and fall in love with is likely from ideal events, where the weather was perfect, the clients had impeccable taste and a large budget, and the venue was an absolute dream to work with. Unfortunately, that’s not always going to be the case, so let your clients know up front that some things are out of your control and the end results can be affected. So when the client is searching for a venue, they should find out if flash is allowed, if the religious building gives you free movement and access during the ceremony, and when the reception set up will be completed – those detail photos just aren’t possible if set up is literally happening during cocktail hour! So give your clients a heads up and manage their expectation by spelling out these potential limitations in your contract.

Weather

Let’s revisit that unpredictable weather, mentioned above. You probably let clients know in the contract that you’re not liable for how the weather affects the look of day-of photography coverage. But does your contract give you final say in making the call not to shoot something because of the risk the weather poses to your equipment? And what about the engagement session – that often can be moved in hopes of better weather, but what are your policies? Who makes the final call – you or the client? When is it too late to reschedule, and are their fees involved? This all needs to be included in your contract.

Style

Yes, your availability and your price range certainly affect if a client hires you or not, but the number one reason your clients come to you is because they fell in love with your style. And this is how it should be! But keep their expectation in check at the beginning about editing and revision requests as well as you Photoshop and retouching policies.

Cancellation and Rescheduling

This is probably the most important contract clause of all – and any half decent contract template will include it (if it doesn’t, run, don’t walk, the other way!). But there’s also so much wiggle room here because the circumstances causing cancellations or rescheduling can be so varied, and often so emotional. Trying to explain to a distraught couple who needs to change the date of their Turks and Caicos wedding at the last minute due to a hurricane why they’re getting charged a rescheduling fee isn’t going to go smoothly. Trust me. So make sure every possible situation is covered in the original contract, and in easy to understand language, so you’re not losing money due to circumstances out of your control and they aren’t surprised when they don’t receive their retainer fee back.

Questions to keep in mind when looking through your contract:

Do I spell out what is refundable?

Are additional payments after the initial payment refundable?

Are there fees for rescheduling or postponing?

Does updated pricing apply?

Are there limitations for rescheduling (i. E. The new date must be within six months of original date for same pricing to still apply) or notification requirements?

These are just the tip of the iceberg when it comes to contracts, which is why it’s so important you work with a barred attorney to draft yours. Not only will a comprehensive, clear contract protect you and the integrity of your business, but it will also put your clients at ease, because they will know exactly what to expect. But most of us don’t have the budget to work with a lawyer on a custom contract, which is why I created templates. My goal is to give creative entrepreneurs the legal and business tools they need, without the headache of legalese or the exorbitant fees. As a licensed attorney in the State of New Jersey, I’ve designed these contract templates to set up any creative business owner for success. Each document is easy to modify, with highlighted text to customize it to your business. All templates provide extensive coverage (Yes, I cover everything I mentioned above and more, no clauses needed!) and are valid in all 50 States, plus free updates are included. What are you waiting for?

MAGI FISHER BIO

Magi is a lawyer, educator, photographer, storyteller, traveler, and entrepreneur. Her journey has taken her from photographing professional surfers while swimming in some of the world’s most epic waves to receiving a Juris Doctorate from Rutgers Law. If she’s not photographing a wedding with her husband, Scott, in a remote locale, managing her team of Associate Photographers at Magdalena Studios, or providing legal counsel to creative business owners via Magi Fisher, she’s probably eating an acai bowl, chasing her pup, Arti, around the beach, or watching SVU reruns in her bungalow.

LEGAL DISCLAIMER

This information is made available for educational and general informational purposes only; it is not legal advice for an individual case nor does it guarantee any future result. This material may be improved upon or updated without notice, and Magi Fisher will not be held responsible for any outcomes as a result of this education. Do not act upon this information without seeking individual advice from a lawyer licensed in your state. You understand that viewing this information does not establish an attorney-client relationship between you and Magi Fisher.


Magdalena Studios

A Classic Green and White Lowcountry Wedding at Montage Palmetto Bluff

This wedding is the epitome of classic – a timeless white and green color scheme, the bride’s bouquet made entirely of calla lilies from Kathryn Anne Weddings, a candlelit indoor reception and the cutest four legged wedding guest! You might even recognize their beautiful venue, Montage Palmetto Bluff, where the Biebers famously tied the knot last year. To see all the reasons why this wedding planned by Spencer Special Events is so incredibly special, don’t forget to check out the full gallery – all captured by Amy Arrington Photography!

From the Couple… The incredible vegetation and water around Palmetto Bluff makes a perfect backdrop for a beautiful event, so we felt like our role was to interfere only minimally and let the space speak for itself. We styled the wedding accordingly: lots of whites, greens, and blues that reflected the environment around us. We wanted the overall impression to be one of thoughtfulness without fussiness—to us, the essence of great hospitality. 

We felt incredibly lucky to have friends and families willing to travel from all across the US (and even some from abroad!) to join us for our wedding. We decided early in planning that we wanted to make sure that all of these people knew how much we appreciated the effort to be with us, so we declared that graciousness was the #1 priority for the whole weekend. This turned out to be a great investment in our ultimate happiness: because we knew that our guests were being celebrated as thoroughly as we were, our own joy came easily. 

The weather in the South Carolina Lowcountry was great during the whole wedding weekend. The only exception—lasting maybe 10 minutes—was a brief rain shower at the end of the cocktail hour following the wedding. Serendipity struck hard: that brief rain shower made for some of the best pictures of the wedding! It also gave us a few minutes of downtime to FaceTime Austin’s grandmother, who was unable to attend the wedding. 

We were grateful to be able to bring our puppy—a Samoyed, named Callie—to the wedding weekend. Callie was a joy the whole time, but she was particularly charming during hair and makeup for the bridal party. At one point, after hours of petting, playing, and dancing with her newfound friends, an exhausted Callie crawled underneath Juliette’s makeup chair and set up shop for the rest of the afternoon. One of our favorite memories from our wedding day was the midnight boat ride that Juliette’s mother had planned for us. In full secrecy, Juliette’s mother planned a midnight boat ride for us to escape the reception. After a full day of celebration and revelry surrounded by friends and family, it was amazing to end our night together (and alone at last!) on the water. It had been such a whirlwind of a weekend, we realized the longest conversation we had been able to have since Wednesday (now Saturday evening) was our vows!

Photography: Amy Arrington Photography | Hair & Makeup: Bride's Side Beauty | Lighting: JLK Events | Officiant: Reverend John Wall | Ceremony Music: Hilton Head Entertainment | Transportation: Old Savannah Tours | Ceremony, Reception & Rehearsal Dinner Venue: Montage Palmetto Bluff | Escort Card Display: Leftover Ladies | Floral: Kathy Bowen | Linen Rental: Party Tables | Linen Rental: Nuage Designs | Planning: Spencer Special Events | Printing Suite: Low Country Calligraphy | Reception Music: Flavor Band | Rehearsal dinner boat transportation of bridal party: May River Excursions | Rehearsal dinner entertainment: Men of Distinction | Rehearsal dinner hair & makeup: Montage Palmetto Bluff | Rehearsal dinner lighting: Amazing Event Rentals | Rehearsal dinner linen: Party Tables | Specialty Rentals: Ranco Tent Rentals | Wedding Dress Steamer: Sue Landi

This Is the Perfect Blueprint for How to Do a Pastel Wedding Color Scheme, Oh So Right.

We’re sensing a trend here, folks – pastel is having a major moment and we’re beyond excited about it! Today’s gorgeous wedding from Charmed Events Group LLC is the perfect blueprint for how to pull off the pastel trend while keeping it elegant. Pineapple Petals Studio knew exactly how to bring their rainbow inspired palette to life, creating an arbor that we’ll be dreaming about for weeks to come. Trust us, you’re going to want to spend a little extra time of today’s full gallery – all taken by Jasmine Lee Photography!

From the Bride… We had started to plan our wedding 1. 5 years before the wedding without being officially engaged. Trentadue winery was the first of five venues we visited and we fell in love with it immediately so everything else paled in comparison. Once I locked down the venue, I reached out to my talented friend Frances of Charmed Events to help me plan the rest of the aesthetics since we’ve worked together many times before for our common clients and all of their weddings were gorgeous! 

It wasn’t hard choosing our vendors since I’ve worked with almost all of them before the wedding day. I mostly wanted France’s great taste in helping me narrow down the design. We had lots of fun choosing all the beautiful details. Halfway through, we finally got engaged at the academy of sciences which is a special place for us as a couple. My husband had said early on he didn’t really want to be involved, he just wanted a party. So, yes, I made most of the decisions without consulting him which actually made things easier. 

It also meant he was totally wonderfully surprised at how everything turned out so beautifully! The inspiration for our day was Pastel sunsets! We love sunset gazing from our window out to the ocean, and pastel sunsets are our favorite. It gave us the beautiful pastel rainbow color palette to work with that can be seen in our entire wedding. I also love anything shiny, so we incorporated angel crystals in the table decor. Another huge running theme was our love for marvel, so we included rainbow colored crystals as our name placement cards for each person, which pay homage to the infinity stones. Our table names were also the names of the infinity stones and some of our favorite Marvel Characters. Lastly, our first kissed was shared over spotting a jellyfish so Frances of Charmed Events also custom made a jellyfish wall for us too! My favorite moment of the day was walking down the aisle with my parents, and seeing all my wonderful family and friends looking back and smiling at me! I could see lots of happy double chins in my photos during this time.

Photography: Jasmine Lee Photography | Floral Design: Pineapple Petals Studio | Dress: Galia Lahav | Cake: A Spoonful Of Sugar Cakes | Invitations: The Idea Emporium | Hair and Make Up: Makeup By Quis | Bridal Atelier: Kinsley James Couture Bridal | Planning and Design: Charmed Events Group, LLC | Rentals: Encore Events Rentals | Winery: Trentadue Winery

How to Keep Your Guests Warm During Your Outdoor Thanksgiving

Thanksgiving. Outside. What could possibly go wrong? No, no. We are not going to think like that. Instead, we are going to embrace the change and arm ourselves for the warmest, coziest, most covid-ly safe celebration ever. Today, we’re breaking down some of the glaringly obvious ways to keep warm – with sources to snag everything – while also cracking the code on some of the more subtle, quieter ways to ensure your family stays toasty and roasty all day long.

photo: white loft studio

THE OBVIOUS.

First up, the obvious ways that you can add a little bit of warmth to your outdoor Thanksgiving. We’re talking heaters and blankets with a few tips on where to buy that won’t totally cripple your bank account. 

photo: Ruth Eileen

Fire Pits. Fire Pits don’t actually provide a ton of warmth unless you are sitting right beside them. BUT. Having some stools or chairs around said pit will provide a warming station that your guests will love. If you want to crank up the style factor, you can put s’mores kits or a hot cocoa cart nearby so that it becomes an activity alongside an opportunity to warm up.

Fire Pits Still Available (at time of publication): SOLO STOVE FIRE PIT | KINGSO OUTDOOR BACKYARD PIT | OUTSUNNY RUSTIC CAULDRON | SUNNYDAZE OUTDOOR FIREBOWL | ESSCHER FIREPIT | SUNNY DAZE OUTDOOR SCREEN | SUNNY DAZE FIRE PIT

photo: Aaron Delesie

Blankets. Blankets draped across each chair would be a gorgeous, Fall-inspired decor touch. But also a thoughtful nod to your guests’ comfort. Now for the dilemma. Do you use your own blankets? Is that safe? (It is as long as you pre-wash them) Do you buy new ones? Can you imagine buying 10 or 12 blankets!? Well, here are a few that 100% won’t break the bank. From personal experience, we used the IKEA Polarvides for an outdoor birthday and let the girls take them home as party favors. At $3 a piece, it was a no brainer.

IKEA VITMOSSA THROW | IKEA POLARVIDE THROW | OLD NAVY BUFFALO PLAID BLANKET | PACK OF 12 COTTON BLANKETS | OLD NAVY RED PLAID BLANKET

Propane Heaters. These will provide a ton of warm and cozy heat. If you have it in the budget to splurge on two, flank your thanksgiving table and you will have happy, happy guests. With covid bubbling underneath all of the celebration, it would be ideal to have separate smaller tables divided up by family so the more heat sources that you can swing, the more confidence you can have in the comfort of your guests. Here are a few propane heaters that are still in stock at the time of publication!

HAMPTON BAY STAINLESS STEEL HEATER | MOSAIC PROPANE PATIO HEATER | HAMPTON BAY PYRAMID PATIO HEATER | MOSAIC HEATER STAINLESS OUTPUTS

Portable Electric Heaters. While these are smaller than their propane siblings, they also don’t provide quite as much warmth. That said, if your space is small or enclosed on a screened patio, an electric heater is a great options as they are often far better looking and more demure than the larger restaurant-style propane heaters. Just a quick note that ALL heaters are selling out like hotcakes. Amazon can’t seem to keep them in stock. So if you see one that fits the budget and will arrive on time, snag it. At the time of publication, here are a few that are still in stock and ready to ship in time for Thanksgiving.

SOARRUCY ELECTRIC HEATER | TAOTRONICS OSCILLATING HEATER | PORTABLE ELECTRIVE THERMOSTAT | PATIOBOSS ELECTRIC WALL MOUNTED HEATER | XBEAUTY FREESTANDING HEATER

photo: white loft studio

Choose the Best Timing. One more little obvious trick. Host your party at peak heat. Usually around 3PM but rewind a bit to 2 so that the temps don’t drop during your actual dinner. If you start cocktails and apps at 2, dinner is served at 3, you can wrap by 4:30 just as it will start to get even cooler (and darker).

THE SUBTLE.

Now, let’s chat about some of the not so obvious ways that you can warm your guests up from the inside out and the outside in. Okay, so “subtle” may be a bit of an exaggeration since you have probably already thought of some of these, but hopefully, we will surprise you with one or two creative strategies:)

photo: Joseph Keller

Hot Drinks. A hot cup of coffee or cider is sometimes all you need to warm up your guests from the inside out. Before you run out and brew the coffee though, spend some time thinking about 1. the dispenser that will keep the hot drink hot and 2. the vessel or cup that will ensure the drink stays warm.

HOT DRINK DISPENSERS: HAMILTON BEACH BREW STATION | NESCO 50 CUP COFFEE URN | THERMAL STAINLESS STEEL THERMOS

CUTE INSULATED DISPOSABLE CUPS: FALL BUFFALO PLAID CUPS WITH FALL WRAPS | HELLO PUMPKIN CUPS | VINTAGE FLORAL CUPS | SO VERY THANKFUL CUPS

Then, to up the style ante, you can turn your hot drink idea into a hot drink station. Something fun, pretty, and practical for guests to enjoy! See some of our favorite ideas below!

photo: Elisa Bricker

Favorite Cider Fix-ins. Rum, Bourbon, Cinnamon sticks, caramel squares, sea salt, candied orange slices, whipped cream, cinnamon, caramel sauce.

Favorite Hot Cocoa Fix-Ins. Bailey’s, Kahlua, Whipped cream, peppermint, marshmallows in various flavors, toffee bits, pirouette cookies, sea salt.

Favorite Coffee Fix-ins. Kahlua, Bailey’s, Chocolate Liquor, Flavoured syrups, milks + creams, bailey’s

photo: Ruth Eileen

Foot & Hand Warmers. If you love to ski, you know how welcome a little foot and hand warmer can be when the temp drops. Place them in little bowls around your yard so that people can use them at their leisure. Make sure to have a place to toss the wrappers and used warmers. Snag yours before they sell out here!

photo: Erin & Courtney De Jauregui

Textiles. While it might be a bit of a hassle to build an indoor room outside, it really will go a long way in warming up your space. Throw rugs, pillows set on chairs, blankets everywhere, even hanging fabric panels to block some of the wind will help in small ways.

photo: Joseph Keller

Strategic Table Placement. Placing the table near a wall or any sort of wind barrier will help keep the elements at bay a bit. Even a pergola or a covered patio will help to shield your guests from frigid temps.

photo: sweet root village

Garage Party. While it’s not as safe as hosting in the complete open air, opening your garage door and having your dining experience weather protected on 3 sides will be infinitely warmer than hosting in the yard. Add a couple of electric heaters and you will likely be quite comfortable. The key is making it feel as warm and cozy as if you were inside, so bringing out a lightweight throw rug, adding a gorgeous centerpiece and some candles, dressing the table in an upscale way. All ideas that will trick the brain into believing that a garage based Thanksgiving dinner is totally normal. Full candor, I couldn’t host a party in my garage. It’s a real mess situation.

Oh! And want to up the safety factor in your garage? Have a few small tables where immediate family only dine rather than one large one, placed at least 6 feet apart.

photo: brett heidebrecht

Outdoor games. While normally added to bring a little charm and fun to an outdoor gathering, outdoor games are great for another reason too…they keep people moving. Moving will both warm their bodies and will distract them from the chilly temps. Big win in our book.

photo: ruth eileen

Dress Warm Reminders. Nothing is more effective in ensuring a happy guest, than a day-of reminder to dress warmer than they would anticipate. I mean, duh. But you don’t want to be pulling out your own clothes to ensure that everyone is warm. Coats and layers, a pair of gloves, cozy socks, even a hat. Just a prompt that will help your guests remember that this year is looking a little different and being over prepared is going to make for a far more comfortable and fun Thanksgiving experience for everyone.